About jolenebalyeat

I am a wife and mother who is constantly designing and creating prototypes of things that inspire. Whether it is through graphic, interior, or product design, I love to innovate. I am drawn to things that are beautiful because I believe they point to the Ultimate Designer, my heavenly Father and the source of all creativity.

Coffee Cup Cozy Tutorial

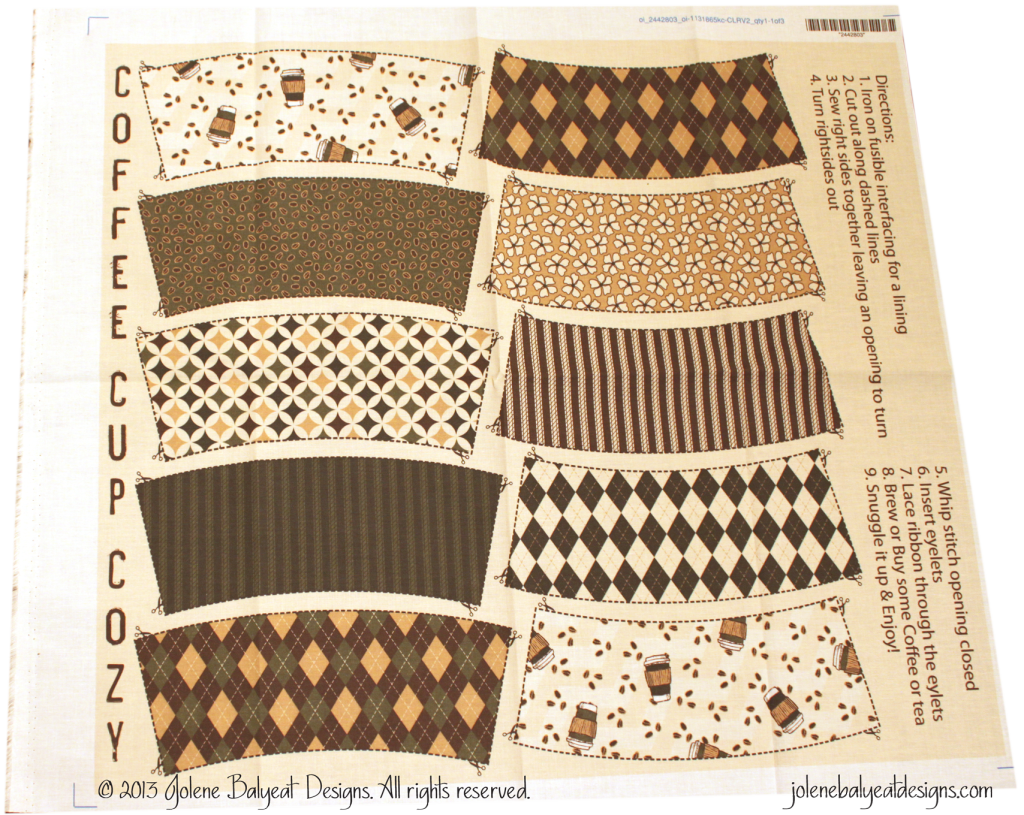
CoffeeCozyBackOctober is a big birthday month for us, and Christmas is just around the corner.  This means that gift season is upon us, and because sometimes it can become a challenge to purchase things for each special person, I have put together the tutorial below for anyone who would like to make a gift instead. It is my first attempt at a tutorial so if anyone gives it a try, please share your feedback with me!  This tutorial is designed to go with my Coffee Cup Cozy cut and sew fabric that is available from Spoonflower.com.  I created the Deconstructed Moss Decor color palette for this design using the Adobe Kuler App. (The photo in the background is indeed the centerpiece mentioned in the color scheme description.)

CoffeeCupCozyFatQuarter

To complete this project you will need:

  • the fabric mentioned above
  • eyelets (8 per cozy)
  • ribbon (34″ per cozy)
  • fusible interfacing
  • coordinating thread

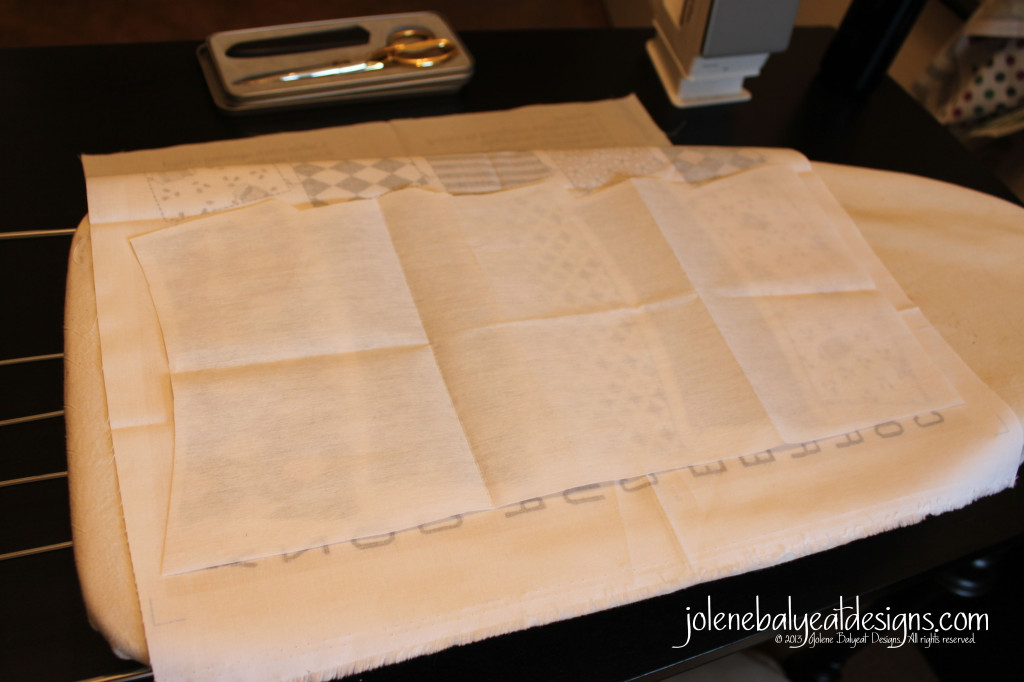
1. Iron on fusible interfacing for a lining. Dont forget to use a pressing cloth, and follow the directions that come with the specific interfacing you chose.

1A_Interfacing

1B_Fuse

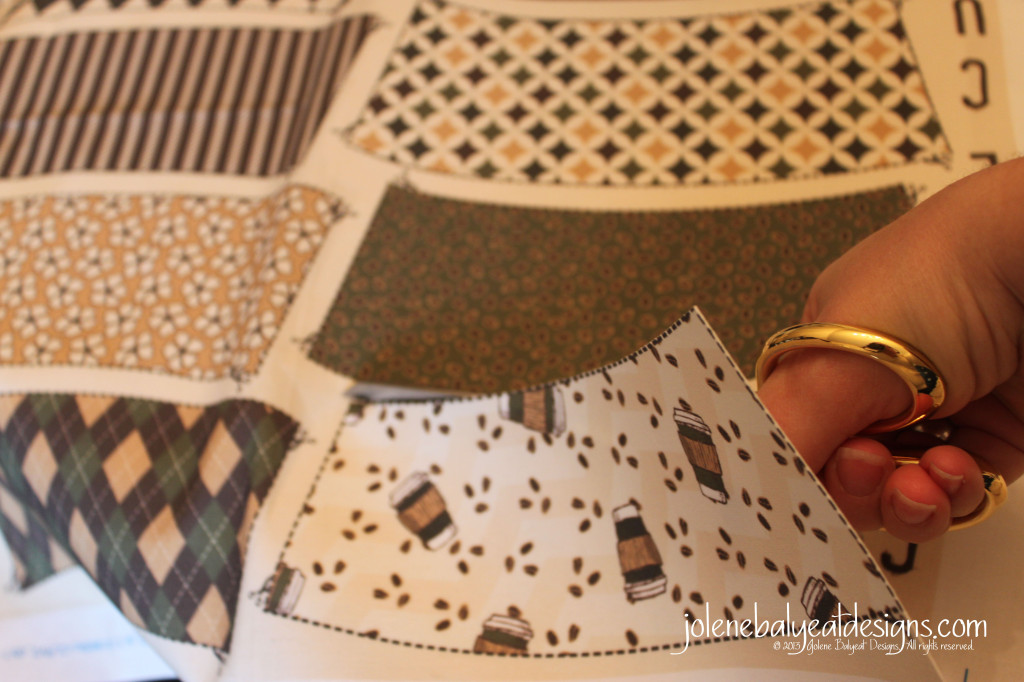
2. Cut out along dashed lines.

2_CutOut

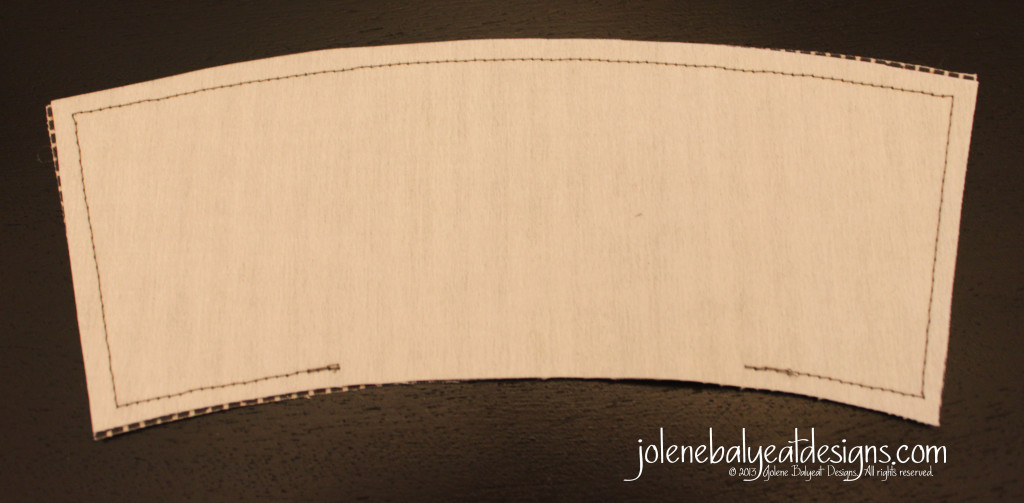
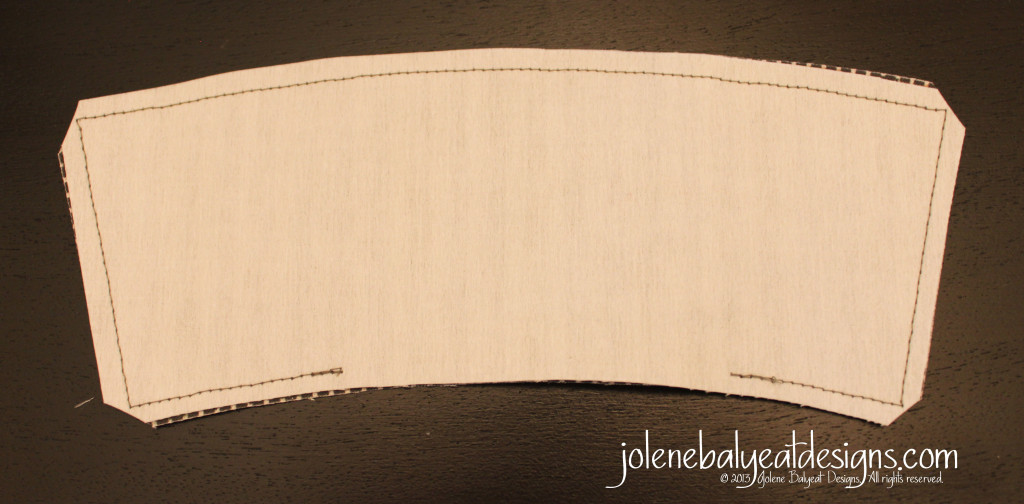
3. Sew the right sides of the fabric together with a 1/4″ seam allowance leaving an opening to turn.

3A_Sew

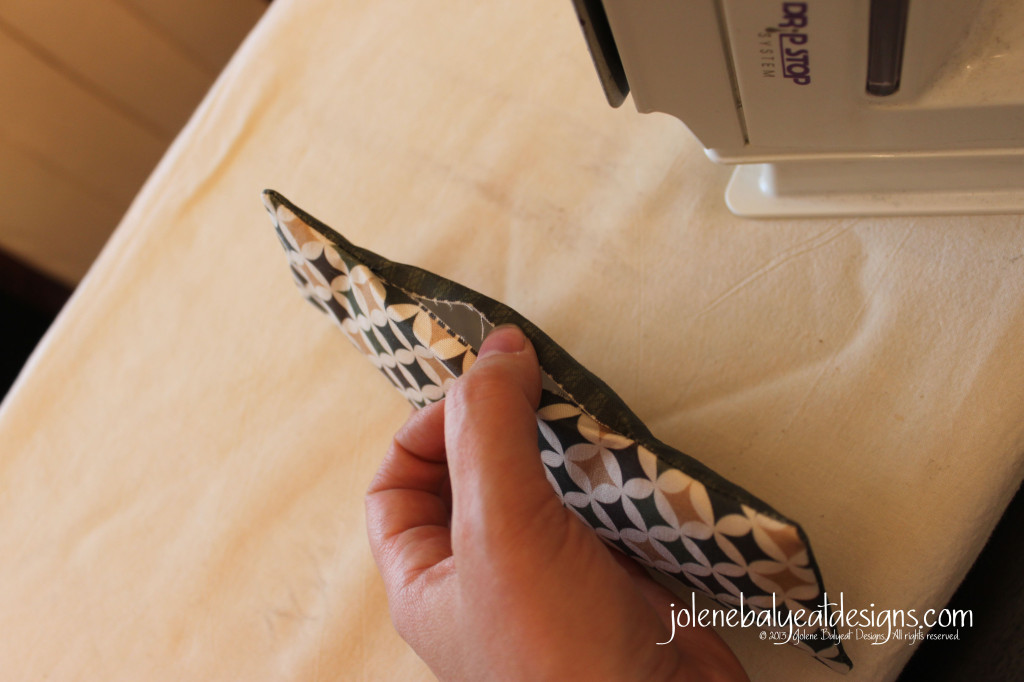
4. Clip the corners at a diagonal to take extra bulk away, and then turn the right sides out.

3B_ClipCorners

I used a pair of scissors to make sure I got the points looking crisp, but using a pencil might be a better idea so one doesn’t accidentally make a hole in the fabric.

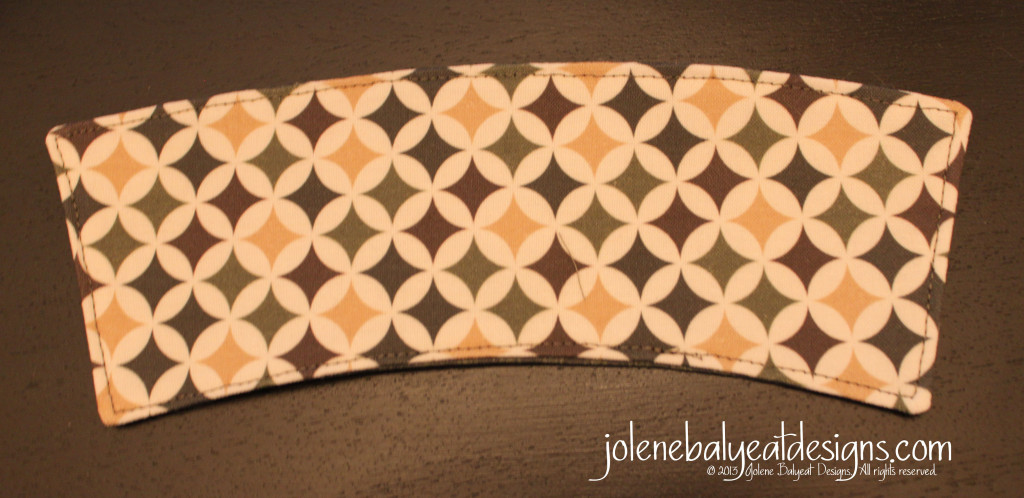
5. Turn opening under, iron it & then topstitch it closed.  I love topstitching as it can give a polished and professional look to your project.

5A_Turn

5B_Topstitch

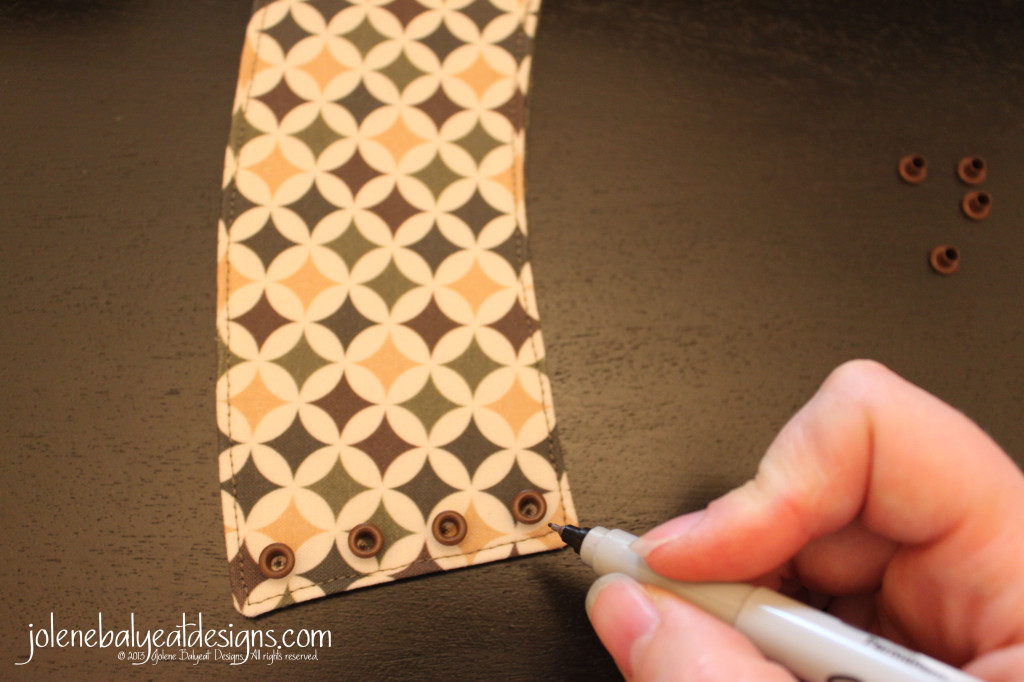
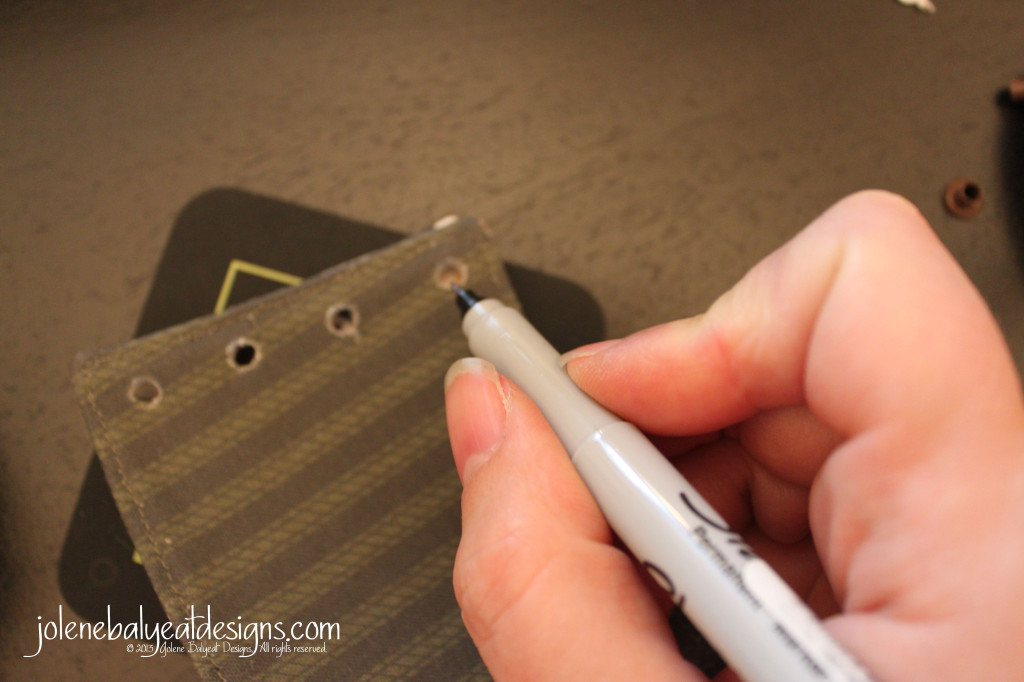
6. Insert eyelets.  Lay four eyelets out along the finished edge and marked the placement of each one. (My fine point sharpie worked perfectly).

6A_Eyelets

Eyelets from Hobby Lobby, Eyelets from PaperwishesOriental Trading Company discontinued the ones I used. The Eyelet Outlet has a mix of browns that might work or they also have blackGrommets could be an even better option.  I just used what I had on hand.

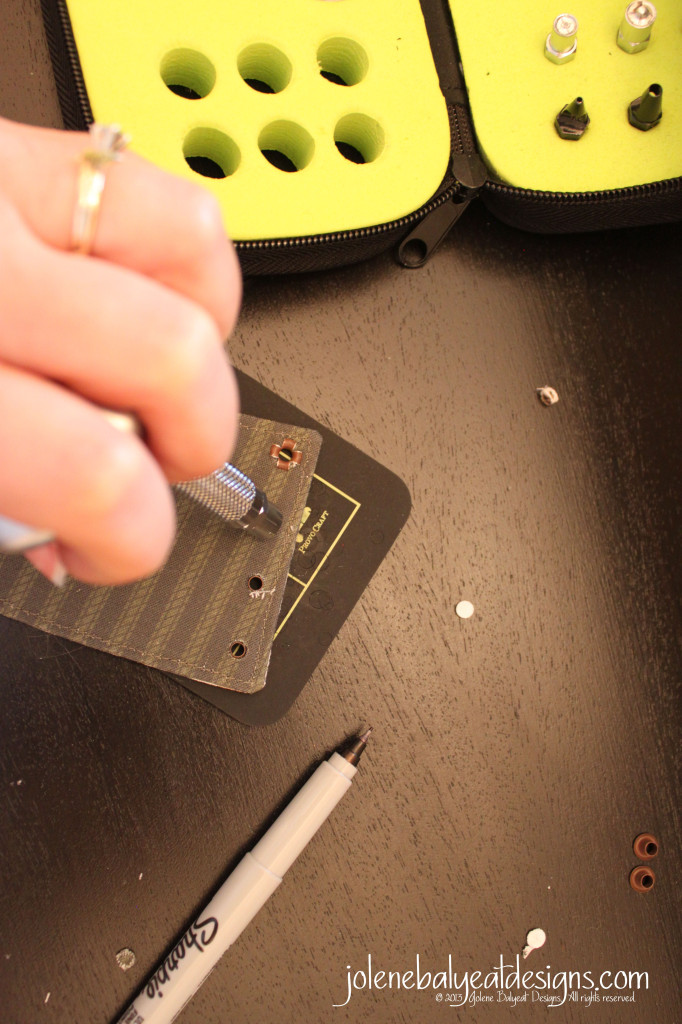
Then punch holes and install the four eyelets. (I used my silent setter scrapbooking hole puncher for this step).
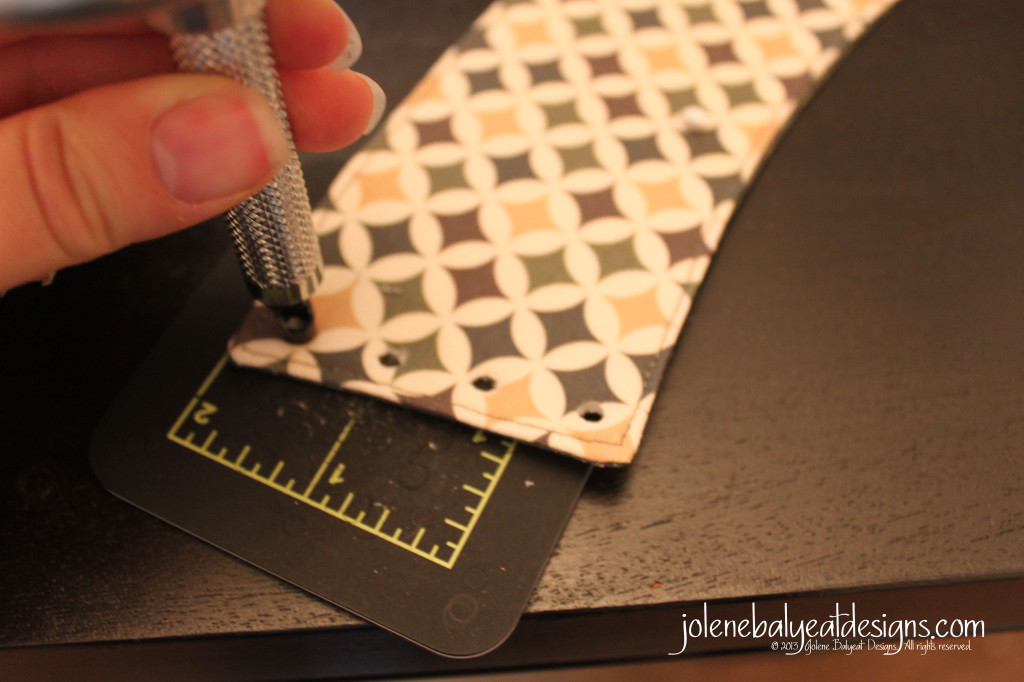
6B_PunchHole

Next fold the coffee cozy in half and mark the other side for eyelet placement.  Punch four holes and install four more eyelets.

6C_Mark

6D_Install

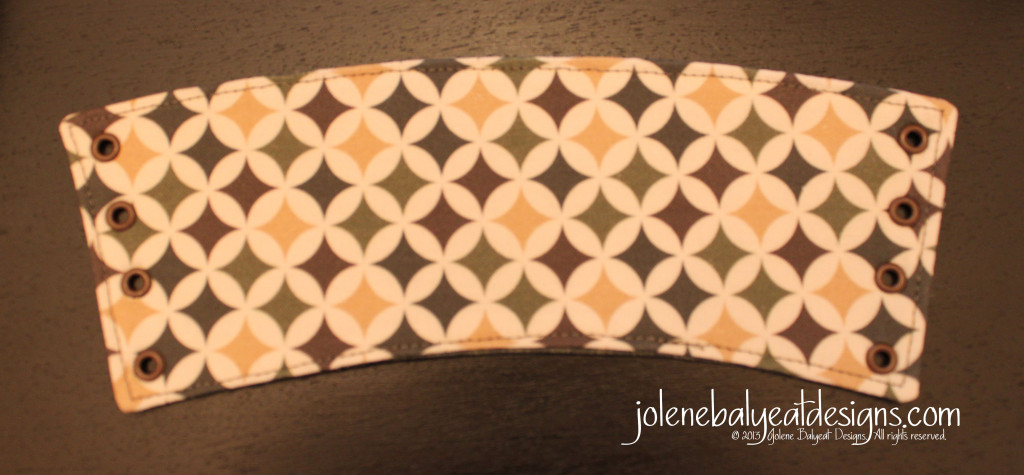
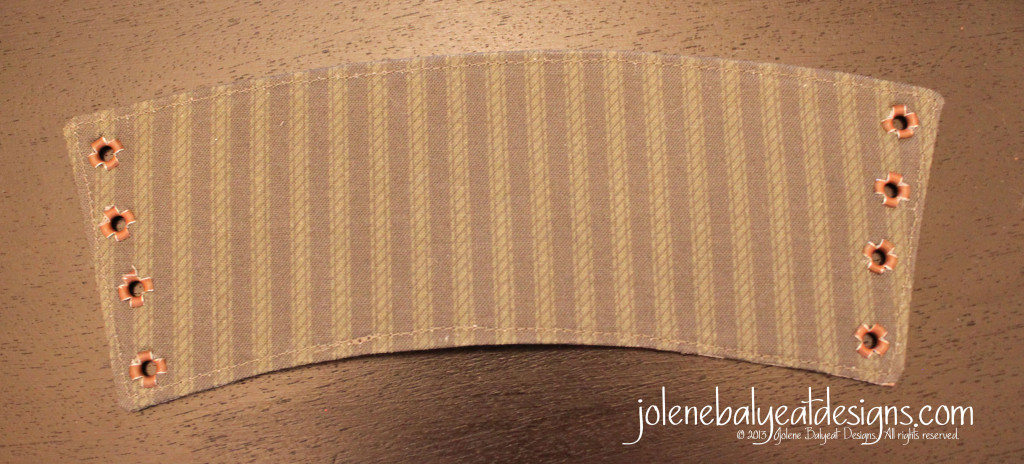
7. Lace 34″ of ribbon through the eyelets

6E_Finish

6F_Reverse

8. Brew or buy some coffee or tea

FinishedCoffeeCozy

9. Snuggle it up & enjoy! This makes a perfect gift with a coffee card hiding inside!
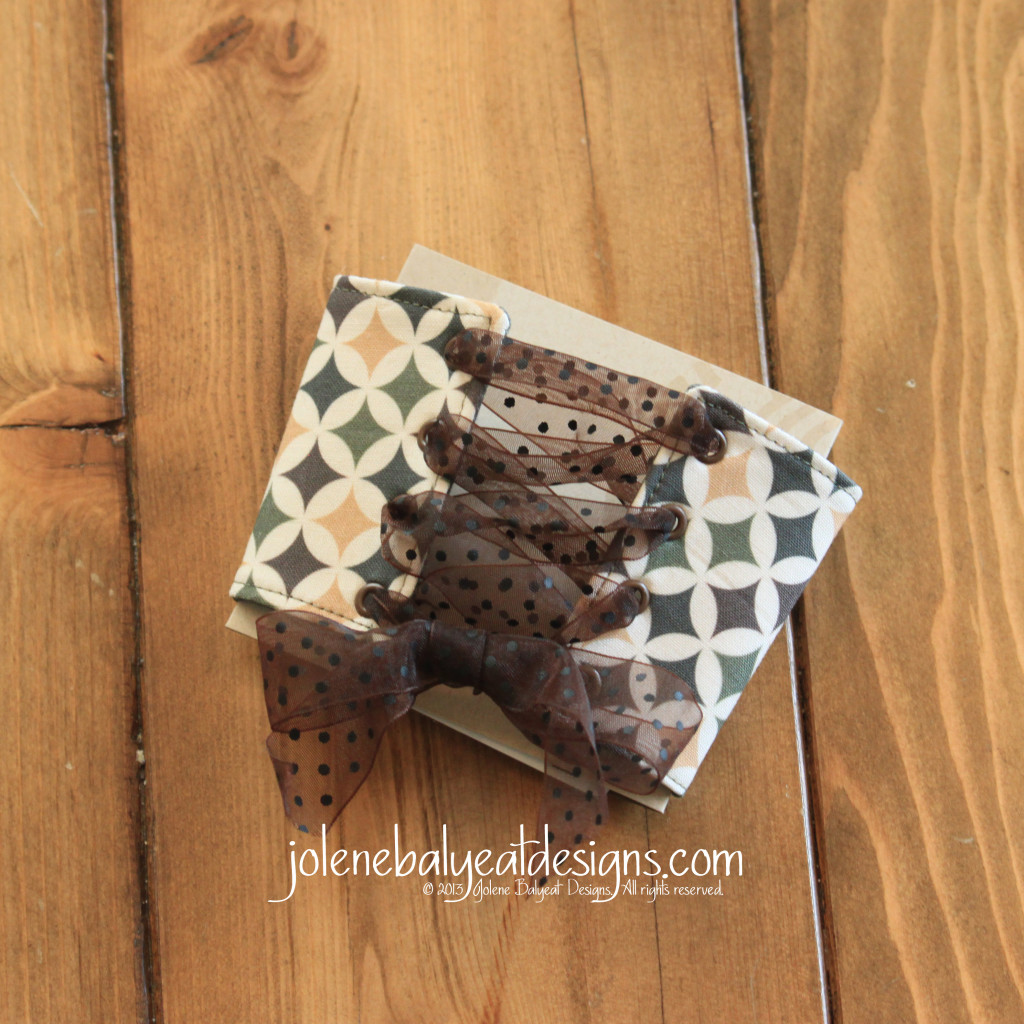
GiftCardPackaging

Inspirational Scripture:
“You prepare a feast for me in the presence of my enemies. You honor me by anointing my head with oil. My cup overflows with blessings.” Psalm 23:5


Meeting Bailey Joy…

MeetingBaileyJoy
It has been ages since I have blogged about a project, and so I am very excited to share a sneak peak of my new Good Dog Bad Dog Fabric collection.  Although it is still in the proofing process, it should be available for purchase through spoonflower.com by the end of September.

*Update:  The Good Dog Bad Dog Collection is now available for purchase!*

This fabric collection is inspired by our new puppy Bailey Joy. Part Beagle and part mini-Australian Shepherd, she possesses a bundle of energy that constantly tempts her to mischief, but she has a good heart and a desire to learn. The images on the Good Dog Bad Dog print come directly from her favorite pastimes these first few weeks.  As I write this post, she is nuzzling me hoping that I will take her for a walk. I hope that you enjoy her antics, but be advised, if you don’t want the novel image of a doggie doo accident, check out the Good Dog fabric, as it is edited for those who prefer to view puppyhood through rose-colored glasses!


Inspirational Scripture:
“She sees that her trading is profitable,and her lamp does not go out at night.”
Proverbs 31:18


La Petite Maison (The Little House)

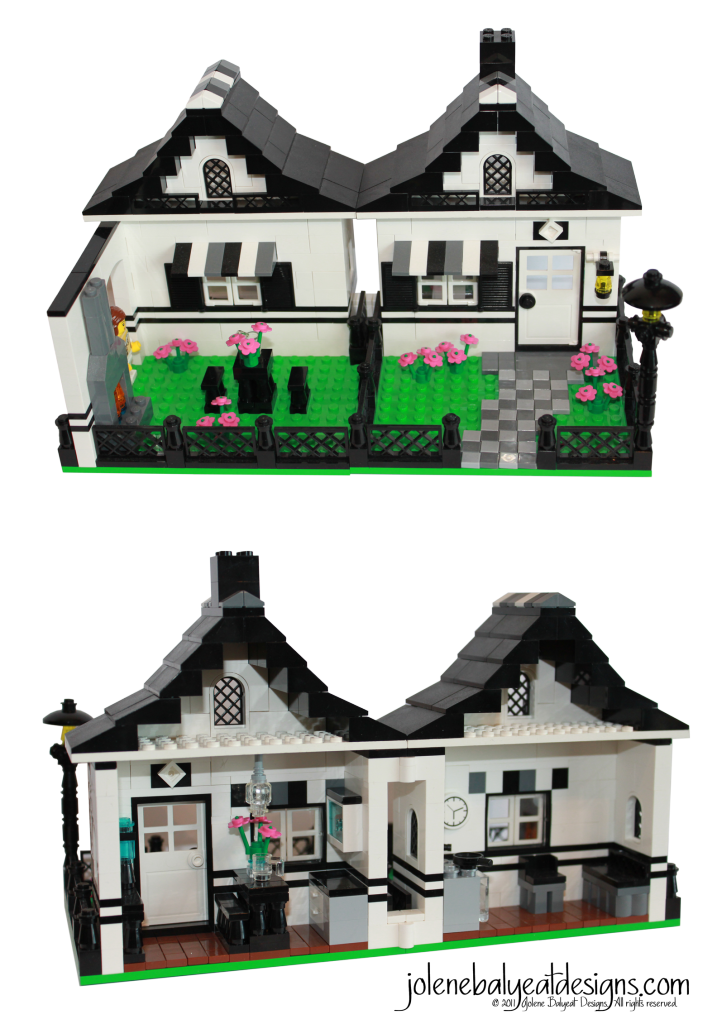
LaPetiteMaisonBlogMy son loves Lego® and we build things a lot. I mean a lot. As an example, this week we built the Lego® Creator Transport Ferry #4997, (1279 pieces) [click here for a stop gap animation by Madaboutlego], the Lego® Creator Highway Transport #6753 (1294 pieces), and the smaller Lego® Creator Ferocious Creatures #5868 (416 pieces). This wouldn’t necessarily be a lot for an experienced builder, but my son is only 5 (as of the publishing of this post)!

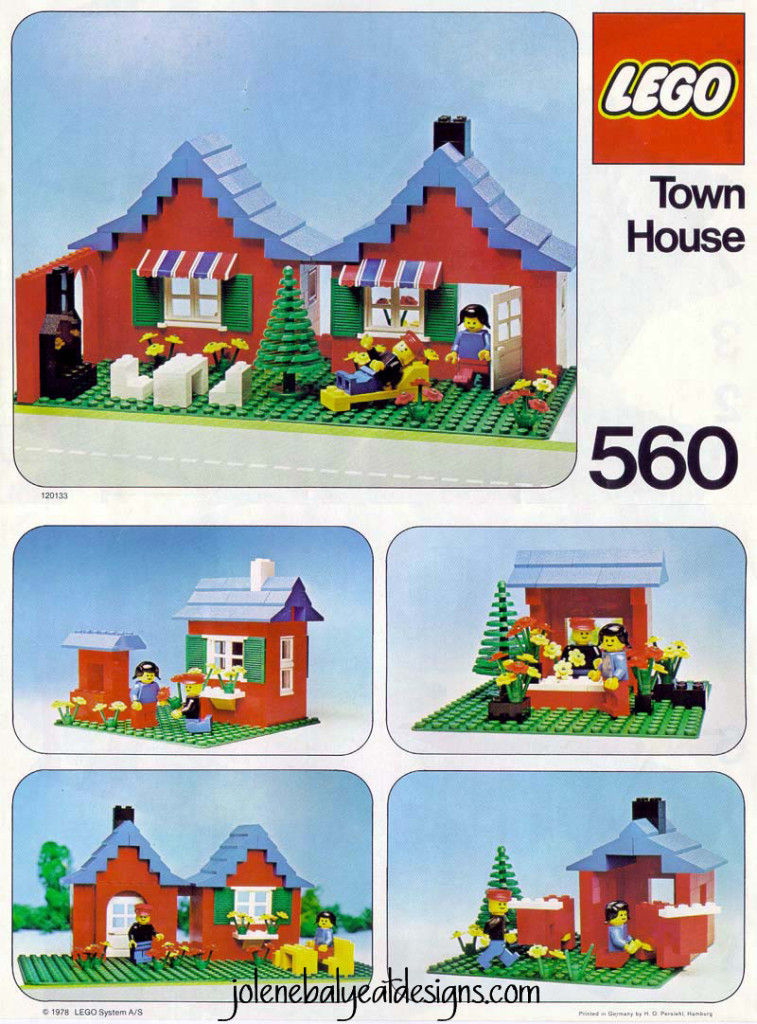
After “shopping” (which is what he calls it when I help sort out the pieces for each step) so he can assemble, I get a little crazy and just want to have the satisfaction of putting a few pieces together myself! I didn’t ever get to play with Lego® as a child (I know, I was totally deprived!) but as an aesthetic child, the primary colors of red, blue and yellow, must not have called to me from the store shelves. So as a grown up, I decided to build my own model inspired by a vintage set (Lego 560 Town House) resurrected from my husband’s Lego® collection. Only, of course I had to redesign it to be more appealing to the little girl of long ago that liked more feminine colors.

VintageLegoThis project has taken a few months of the middle of the night hours. It was a bigger challenge than I anticipated, because I was building virtually and have no background in 3d software or code of any kind. I’m not gonna lie, the learning curve is not for the faint of heart!

Lego® has a section on their website that lets a novice user design their own creation by downloading their free Digital Designer software, but I soon discovered that you couldn’t control how your instructions were going to look, and were limited only to standard pieces that are available on their sight for the moment. So I researched other options and discovered LpubLdrawBricksmithLdGliteLDview, and Brickstore, all programs that could help me with the challenge at hand.

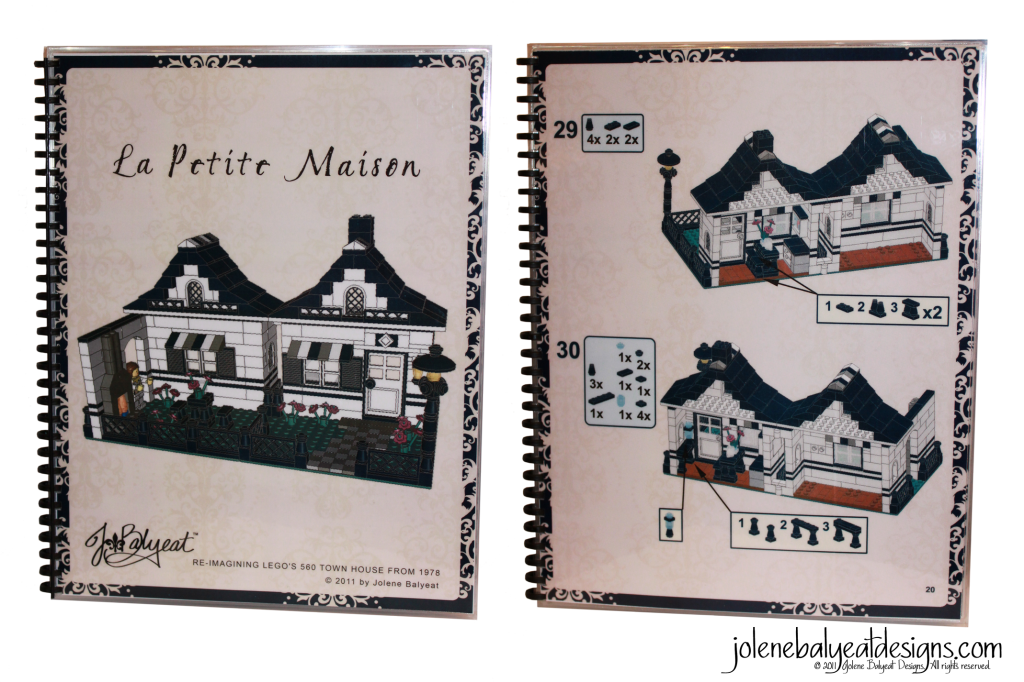
I should pause here to mention that there is a very large and brilliant Lego® community in this world, that I had never encountered before, and these devoted souls are creating amazing things, both in terms of models, and programs, and videos of their creations. My little 621 piece model with its step by step instruction book, and xml file that automatically fills your Lego® wish list at Bricklink is merely an attempt to put a little something within the reach of the girl who might enjoy building, but wouldn’t have considered it before.

I am excited to report that I was able to purchase most of the pieces from Lego® and the rest from Bricklink and build an actual physical model to test out the instructions. I have found that many people outside the serious Lego® community, are unaware of the Pick a Brick section on the Lego® website where you can individual pieces for your own building projects.

LaPetiteMaisonInstructionBookFor fun, a listing for a PDF of the Instructions, parts list with part numbers, color quantity and description, and a Bricklink XML file is available for purchase on JBalyeat.com, just in case someone else wants to build La Petite Maison. Interestingly, in January 2012, Lego® did finally introduce a line of product for girls!

Inspirational Scripture:
“For every house has a builder, but the one who built everything is God.” Hebrews 3:4


Building a House

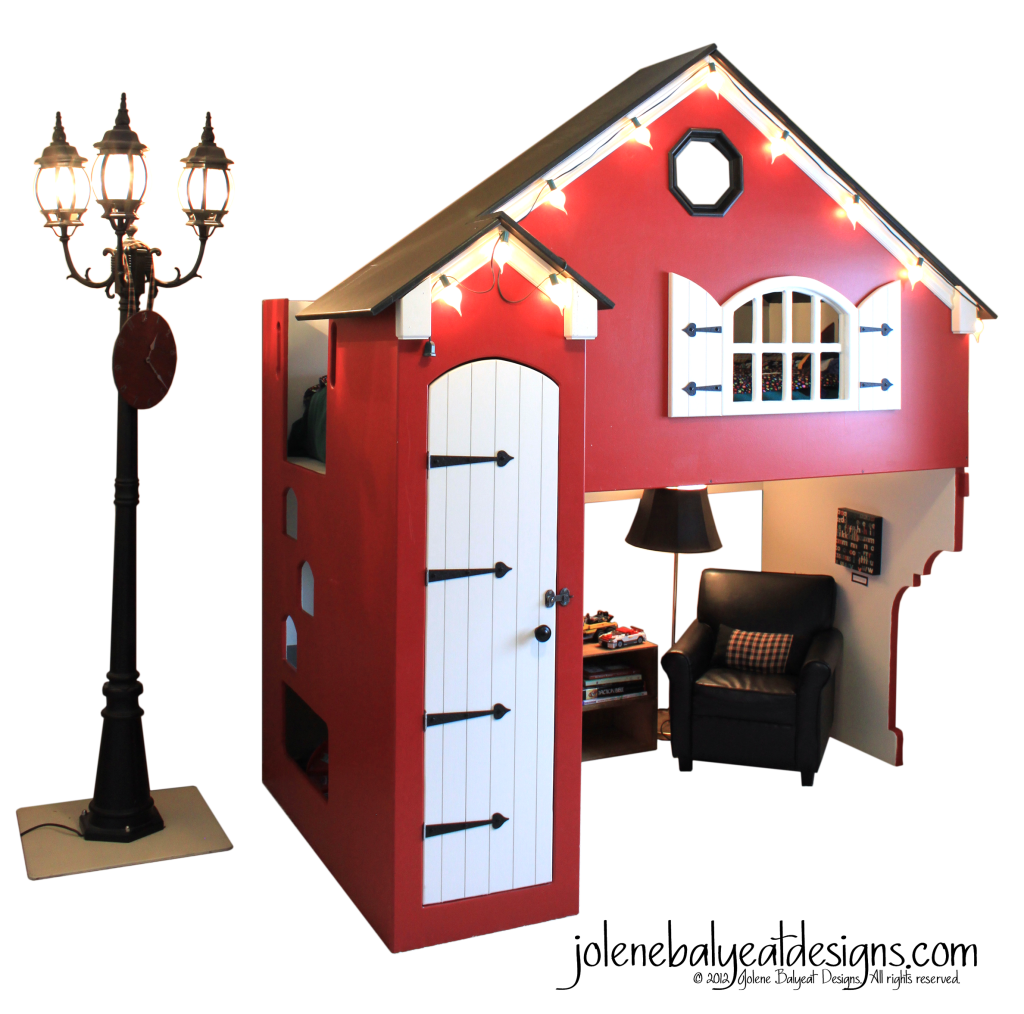
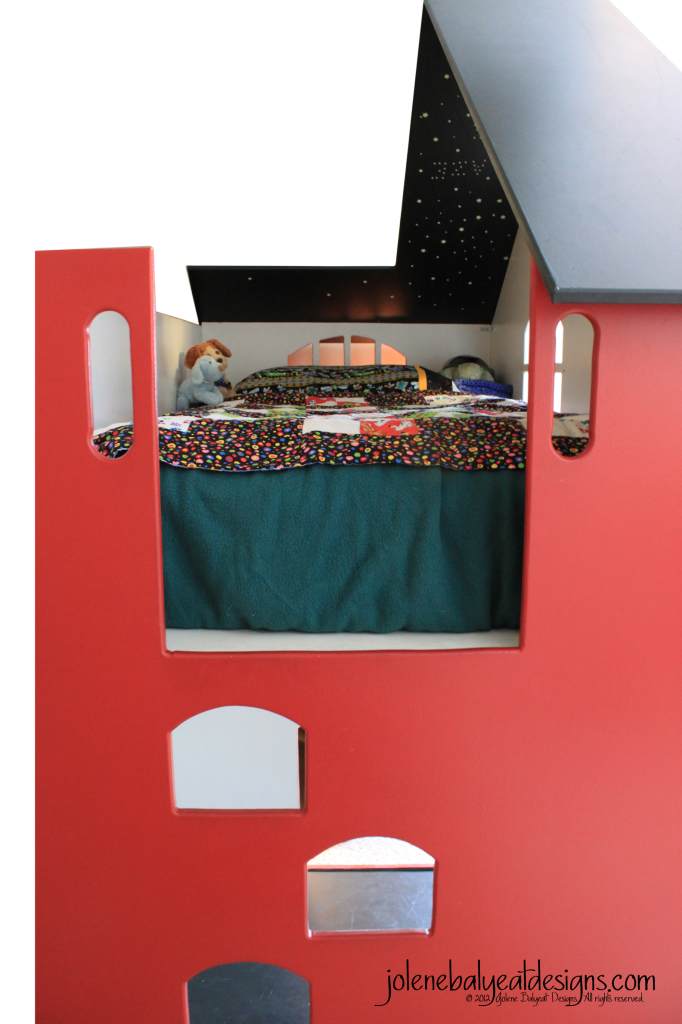
HouseBedFrontAngleWhen our son was just about to turn four, he was ready to graduate from his toddler bed to something larger. His room at the time was very small, so I wanted to come up with something that would maximize the available space, fit a twin size mattress, and double as a play area. When I discovered the company Tanglewood Design, I was thrilled to learn that in addition to selling kits, and ready made beds, they also sold the plans for the DIY family to customize and create their own masterpiece. I absolutely fell in love with their philosophy and designs, plus they were personable and helpful as well, so I highly recommend them!

HouseBed2UPMy husband agreed to take on the building project. In his spare time over the next few weeks he borrowed a friend’s wood-shop and tools. When he was done cutting out the pieces, he rented a truck and brought them home for me to paint. My original idea was to make a giant tree for the corner of the room, with a rounded door in the trunk, so that our son could go into the trunk to climb into his bed. I wanted LED lights to hang in branches over the roof line to twinkle as a nightlight, but I couldn’t find a tutorial anywhere to create such a thing, and as our budget and space were limited, that part didn’t come to fruition. However, months later, I stumbled on an article that featured just such a tree (albeit in a beautiful fairy tale girl’s room) designed by Kidtropolis. Feel free to check out their link so that you can imagine the complete concept!

Below is a view of the inside of the bed where our son sleeps. The brilliant part about this design is that the space under the bed is big enough for a double mattress, if a family has more than one child or prefers a bunk bed option. We elected to stage it as a little man cave, and set it up like a miniature living room. We added a door (not in the original design) so that we could close in the bookshelves, and keep the space from looking cluttered. Instead of a tree, in keeping with the play house theme, we had a steel plate made for an exterior park light (so that it can’t tip over).

HouseBedUpperOur son still absolutely loves his bed. I never tire of hearing him tell someone he meets for the first time, “I have a house bed that my dad and mom made…and I got to help!” My husband and I joke that we always wanted to build a house together someday. Now we can cross it off our “bucket list”.

Inspirational Scripture: Psalm 127 & Joshua 24:15


Technical Difficulties

Beginning this last week I have been experiencing a few technical difficulties with my computer randomly shutting off while I am performing the usual tasks required for preparing blog posts. (I know this is normal for all of you PC users, but I have been spoiled with a Mac for several years now, and it is unusual for me!) So have no fear, with a plethora of projects to share, they will be coming as soon as a work-around is discovered.

There are also a few things in the works that I can’t wait to share. I am just working on programming aspects that are way over my head. Sometimes “It’s just not right!” that I have to “do coding” in order to complete a project. My Bassett Hound would have better luck studying quantum physics! After all I prefer to just design and create. I am sooo not a programmer! But on the other hand, asking dumb questions of genius software designers that live overseas, is an exercise in humility. Combine that with stubborn determination, a creative type that doesn’t know any better even though she should, hours plugging in numbers randomly to see what happens to the code each time, and who knows what new creation will surface! If a completed project doesn’t show up each week, it may be because I am working on one of those 40 hour, or yes, even 80 hour projects.

In the mean time, (as my computer just crashed again) it is a perfect opportunity to ponder the deeper questions in life, and practice not “freaking out” about electronic circumstances, no matter how aggravating they may be. I am reminded daily (and sometimes hourly) how much I don’t have all the answers to life’s questions. Thankfully, God does and we can go to Him.

So if a “deep thoughts” post shows up; following is my disclaimer. If I get a glimpse of a corner OF a truth, that is sooo very different from claiming to have a corner ON the truth.  God often puts something in my heart that shocks my mind and I may initially want to reject it. But if it keeps coming back and feels like an “Ah-Ha!” moment, I am forced to consider it. When I attempt to share it, it can be miss-understood, and it is possible that I, myself miss-understood it to begin with. (i.e. That I am wrong.) The fear of being wrong or presumptuous would be a sorry excuse for never taking the risk to share something that could bring, life, hope, beauty, and truth to someone and thereby glory to my Heavenly Father. I refuse to be enslaved by fear. I wish it was possible to be “right” about things all the time, but I realize that that is impossible, because we only see part of the picture. So in all humility, I ask for grace, that we may anticipate and discover moments of beauty together!

Regarding wisdom & grace: James 1:5 & 1 Corinthians 1