 I certainly cannot make a quilt in a day! But that is because when I set out to do something I know nothing about, I have to learn through trial and error…sometimes a tiny error that turns out to be massive by the time I follow it to the end. I was staring at some 8 inch swatches, trying to decide what to make with them, when the thought of a guest room quilt to go on my not-so-lovely air mattress, popped into my mind. The trouble is, I didn’t want to do squares. So I found a lovely little tutorial on how to make a diamond shaped quilt on Pinterest. But the process looked way too time consuming for my short attention span.
Then inspiration struck. What about designing a “cheater” quilt with fabrics from my collection? (For those who don’t sew, a “cheater” quilt is a panel of fabric with all the designs printed, so all you have to do is sandwich some quilting batting between the decorative front side and a coordinating back side, sew along the lines, and add a binding.) Easy peasy right? Well, theoretically…
My problem was that I had to design the decorative panel template before I could “sew it in a day”. Also I wanted to make it a bit bigger than a twin…just in case I wanted to use it on my double size bed. Well, at last it is designed, but the whole design process from start to finish was much longer than a day! Through trial and error, I discovered that when doing a diamond pattern, one must be sure to line up the diagonal axis not just the horizontal and vertical axises. Um…’bout that, I didn’t discover the offset diagonal until I went to sew. 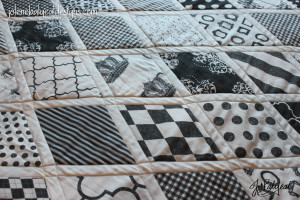 The picture above shows the weird jog I had to do in the intersections to get my needle back on track. I have since fixed this in the design template so anyone else who orders yardage of the JBalyeat Quilt Sampler won’t have that to deal with. The upside is that my sample is still usable, arguably plenty nice for an air mattress. Also, Blaze, who is seven, was able to sew with me (since my personal “perfection meter” was stuck in “reboot” for an entire 30 minutes after seeing my mistake).
So, let’s tally up the time all together now shall we?
- Time surfing pinterest for quilt ideas = Not countable.
- Planning dimensions = At least a day
- Designing template = At least another day
- Trying to visualize the binding I wanted = A day
- Pinning and sewing the top = Portions of two days
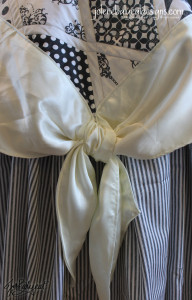
- Trying to be frugal and piece together scraps of a friend’s discarded satin sheets for the binding = Another day
- Redesigning the template after realizing my geometry gift hasn’t evolved since high school = Another day
- Waiting for my computer to upload the file to Spoonflower = Another day…ok, not really but it felt like it!
- Setting up the dining room like a pretend guest bedroom and photo-shopping a sunset outside the window to make a pretty picture = Yep, you guessed it…part of another day.
So for me it was more than a week. But anyone content to start with a template already made, do a traditional binding, and not rearrange their entire house for a photo shoot, could totally pull this off in a day…Easy Peasy!
 Oh, and for any one who wants to make their own template. Just a couple days after I ordered my sample, Spoonflower posted a tutorial on how to make your own cheater quilt…hummm…must have been a good idea after all!
Inspirational Scripture:
Proverbs 31:22


